How to Enable Always-on Display on Redmi Note 17 Pro with HyperOS 3
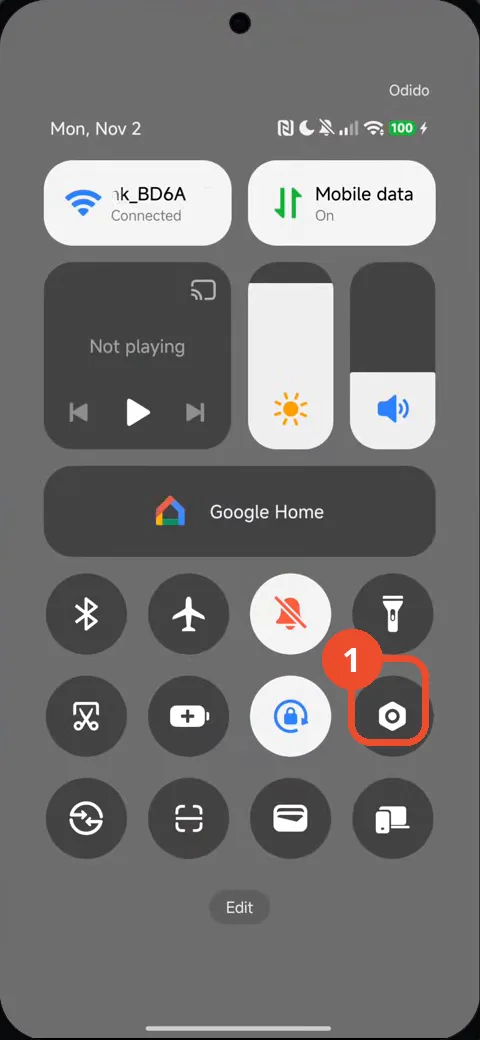
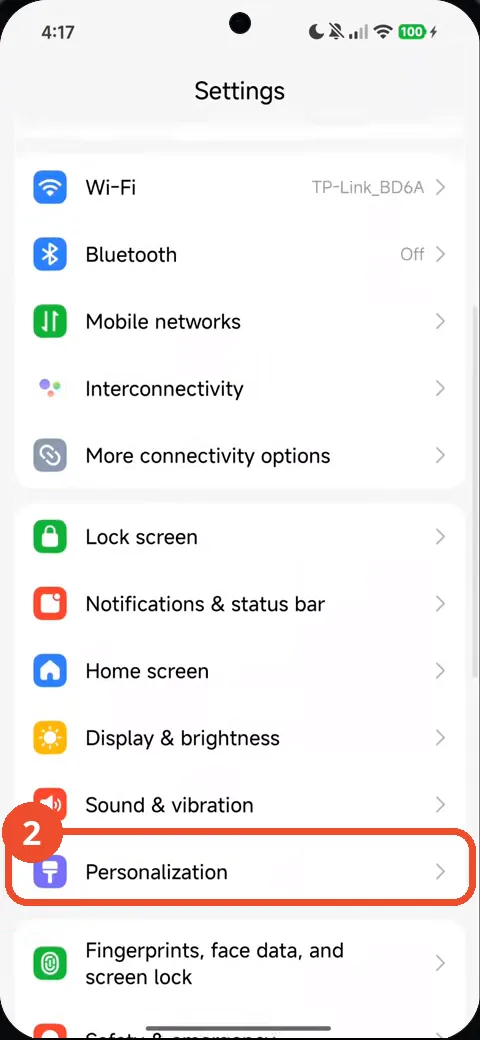
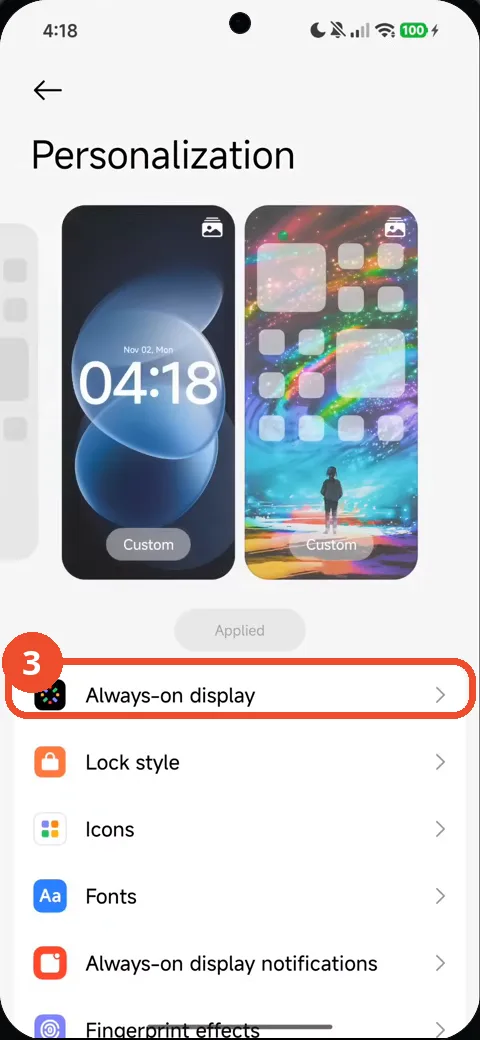
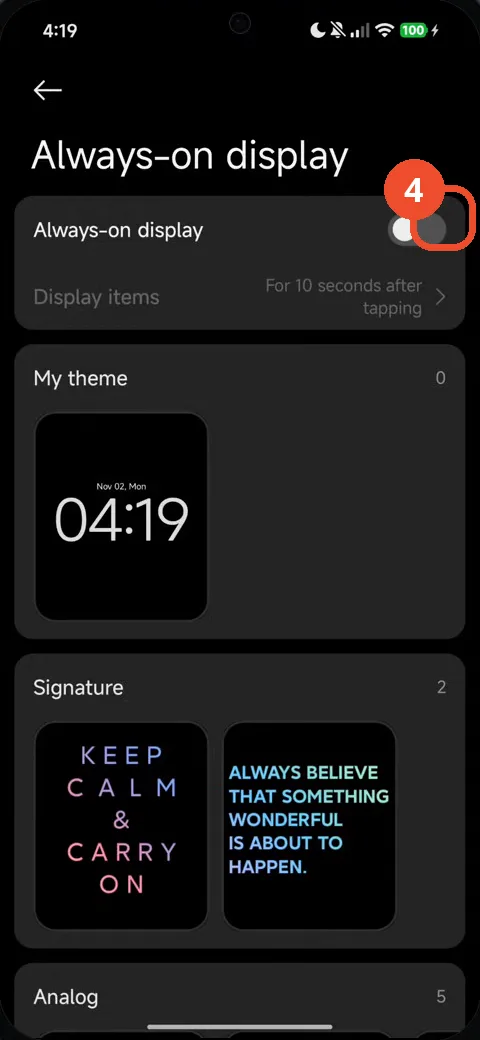
Always-on display lives under Personalization in Settings. Swipe down for Quick Settings, open Settings, scroll to Personalization, then open Always-on display — the switch at the top turns it on.
- DeviceRedmi Note 17 Pro
- SystemHyperOS 3
- AppSettings
- Also works onOther Xiaomi phones running HyperOS 3
- Last verifiedNovember 22, 2026
Every screenshot below is taken from the actual recording on this device — no stock images.
Steps
Swipe down to open Quick Settings, then tap the Settings gear
Swipe down from the top of the screen to open Quick Settings, then tap the gear icon.
Scroll down and tap Personalization
Scroll down the Settings list until Personalization is in view, then tap it.
Tap Always-on display
On the Personalization page, tap Always-on display.
Turn on the Always-on display switch
The Always-on display switch at the top of the page is off. Tap it to turn it on.
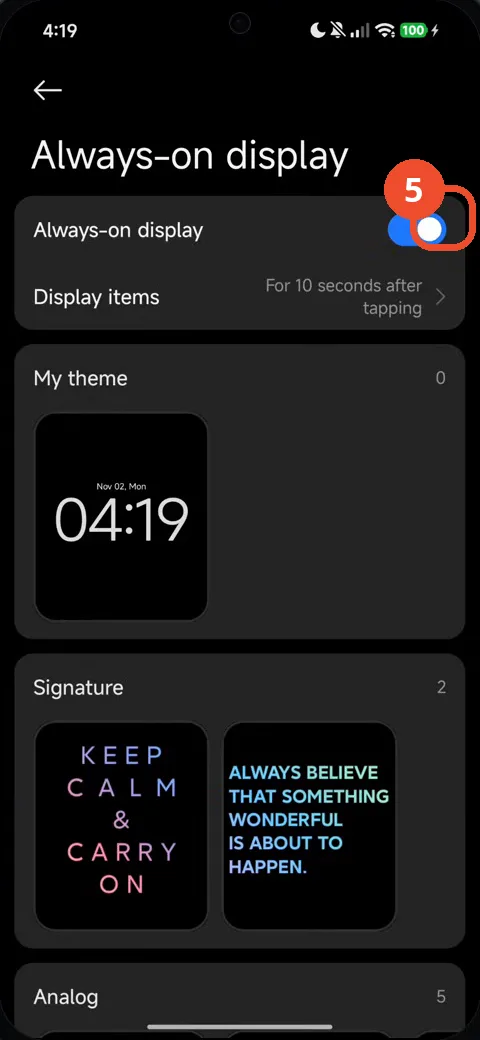
Check that the switch is on
The switch is now on (blue), so Always-on display is enabled. That is the confirmation.
Good to know
- The switch is off at the start of this recording and is genuinely switched on — this video changes the setting, it does not only check it.
- Display items is set to show for 10 seconds after tapping; the theme, signature and analog styles are picked on the same page.
- Turning it on shows the time and date on the lock screen while the phone is idle.
- How to Check NFC Is Enabled on Redmi Note 17 Pro with HyperOS 3
- How to Check Mobile Data on Redmi Note 17 Pro with HyperOS 3
- How to Check RAM Usage on Redmi Note 17 Pro with HyperOS 3
- How to Turn Off Vibration and Haptic Feedback on Redmi Note 17 Pro with HyperOS 3
- How to Check Battery Health on Redmi Note 17 Pro with HyperOS 3
- How to Check the 80% Charging Limit on Redmi Note 17 Pro with HyperOS 3
- How to Remove Lock Screen Shortcuts on Redmi Note 17 Pro with HyperOS 3
- How to Check Gmail Notifications on Redmi Note 17 Pro with HyperOS 3
- How to Enable the App Drawer on Redmi Note 17 Pro with HyperOS 3
- How to Find Your Wi-Fi IP Address on Redmi Note 17 Pro with HyperOS 3
- How to Find and Apply a Free Font on Redmi Note 17 Pro with HyperOS 3
Guide complete
Every step above comes from the original recording, with a screenshot for each step. Want more like this? Browse all Redmi Note 17 Pro guides.